How to Build a Wooden Geodesic Dome
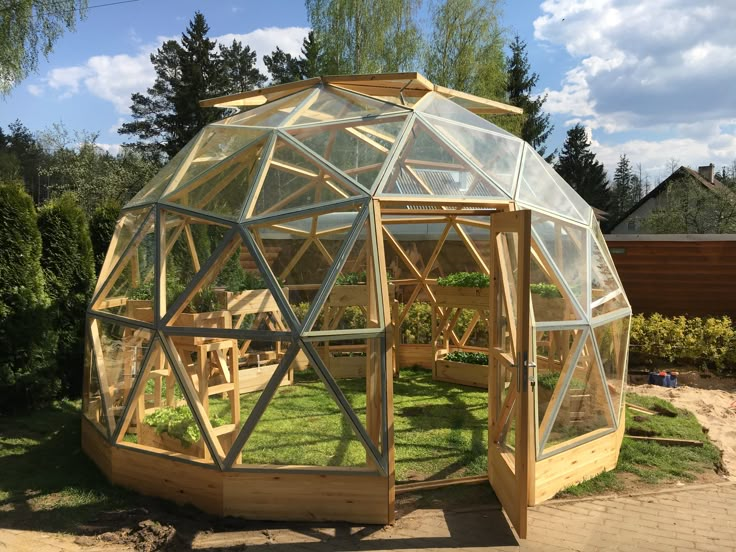
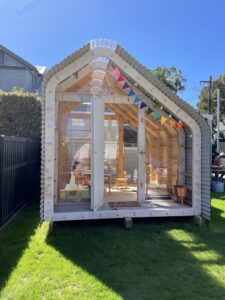
This guide provides step-by-step instructions for constructing a wooden geodesic dome, like the one in the image. Geodesic domes are energy-efficient, strong, and visually unique.

1. Planning & Design
- Blueprint & Measurements:
- Determine the size and frequency of the dome (e.g., 2V, 3V, etc.).
- Use an online dome calculator or geometric formulas to calculate the triangle dimensions.
- Permits & Site Selection:
- Obtain necessary permits.
- Choose a stable, level surface for construction.

2. Foundation Construction
- Types of Foundation:
- Concrete Piers (as shown in the image) provide stability while allowing for airflow beneath the structure.
- Slab Foundation is another option for a more permanent build.
- Preparing the Base:
- Dig holes and pour concrete footings for each pier.
- Secure treated wooden beams on top of the piers to support the dome frame.

3. Constructing the Wooden Frame
- Material Selection:
- Use treated lumber (2×4 or 2×6 beams) for durability.
- Fasten the joints using metal plates, screws, or bolts.
- Building the Dome Structure:
- Base Frame:
- Construct a hexagonal or pentagonal base with wooden beams.
- Triangle & Pentagon Frames:
- Cut the wooden beams into precise triangular sections.
- Assemble triangular sections into hexagons or pentagons, then connect them.
- Ridge Beams & Roof Structure:
- Continue adding sections upward until the dome shape is complete.
- Base Frame:

4. Installing Flooring & Walls
- Flooring:
- Install plywood sheets over the wooden base for stability.
- Walls & Openings:
- Plan areas for doors and windows before covering the frame.
- Use insulated panels, plywood, or transparent polycarbonate for walls.

5. Roofing & Finishing
- Roofing Options:
- Plywood + waterproof membrane + shingles or metal sheets.
- Transparent polycarbonate for a greenhouse-style dome.
- Exterior Protection:
- Apply wood stain, paint, or weatherproof sealant to protect the structure.
- Interior Work:
- Add insulation, wall panels, and flooring finishes as needed.
Final Notes
- Construction Time: Several weeks, depending on size and complexity.
- Cost Considerations: Wood, fasteners, and insulation can vary in price.
- Strength & Durability: The geodesic design distributes weight evenly, making it resistant to wind and snow loads.
Would you like a list of materials and tools needed for this build? 😊